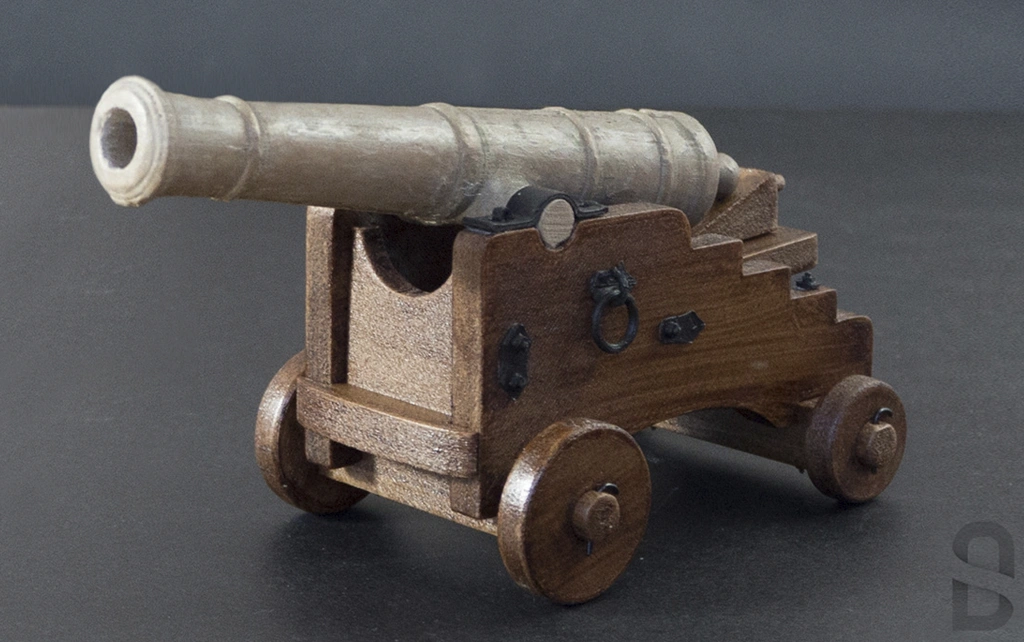
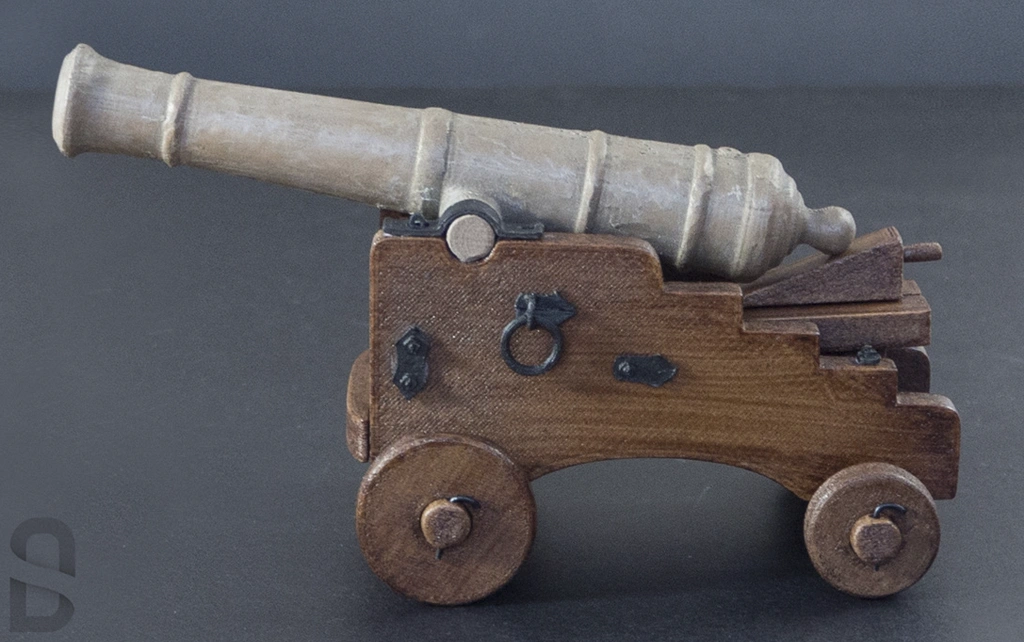
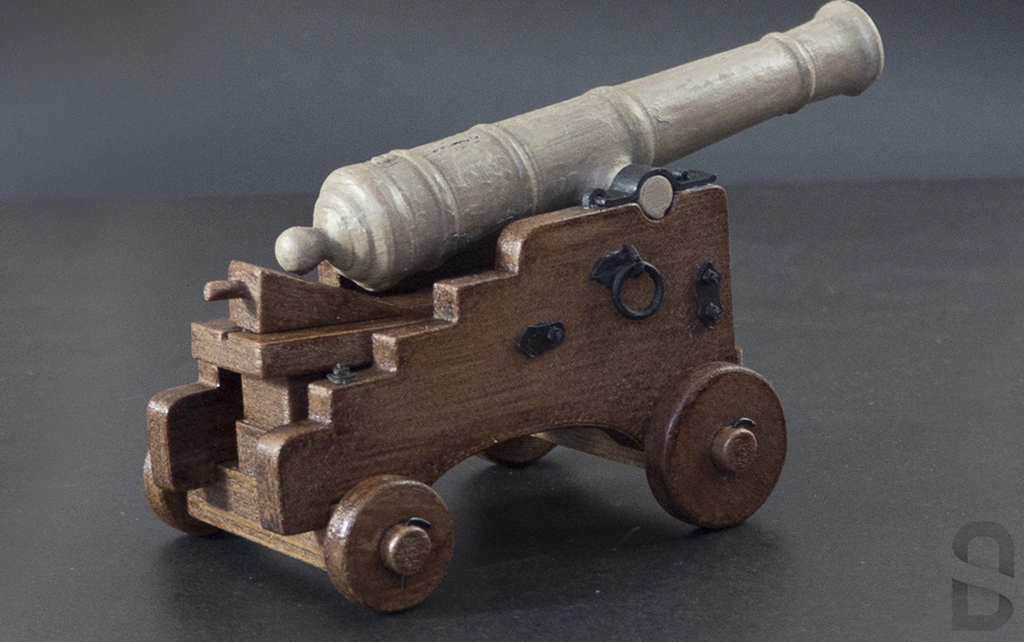
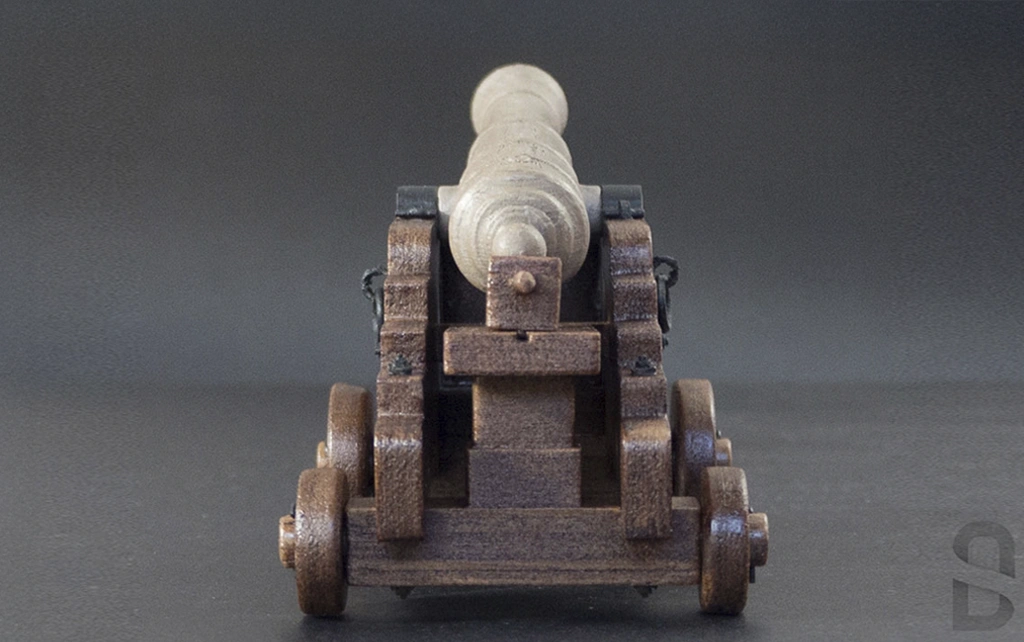
3D Print an 18th Century Bronze Cannon
Tutorial for building your own realistic model cannon
Project information
- Category: 3D Printing
- Client: Personal Project
- Date: October 2023
This tutorial concentrates on the 3D printing and assembly of the cannon. The 3D modelling phase, whilst briefly outlined, is beyond the scope of this tutorial.
The free downloadable 3D .stl files are for personal, educational and non-commercial use only. If you use the files, a link back to this page or a follow on twitter or mention would be appreciated!
Download the 3D printable cannon STL files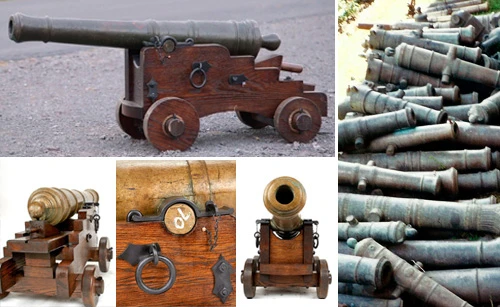
Stage 1 Research
The internet was used to research various designs of cannons and their construction. This 18th century bronze cannon design was chosen.
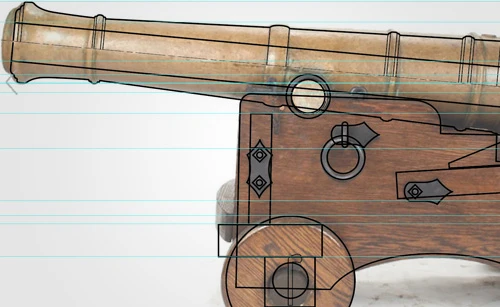
Stage 2 Creating Reference Images
Using the research photos, orthographic views (front, back, side, top etc.) were sketched up in Illustrator. These views were imported as reference images in Blender to help with modelling the components, placing the front, top and side views on their respective planes.
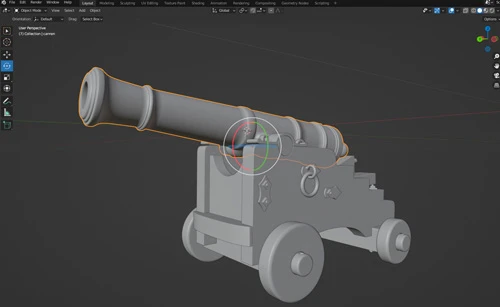
Stage 3 3D Modelling and .STL File Creation
Using the reference images, the components of the cannon were modelled using polygonal modelling and subdivision surfaces in Blender.
Each component was then individually exported as an .STL file directly from Blender, ready for use in the 3D printing software.
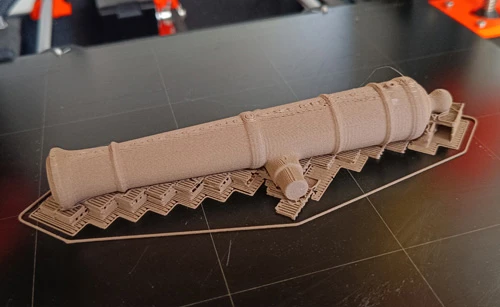
Stage 4 Slicing and 3D Printing the Model
Import the .STL files into your 3D printing software of choice. In this case PrusaSlicer was used.
The components can be scaled to the desired size.
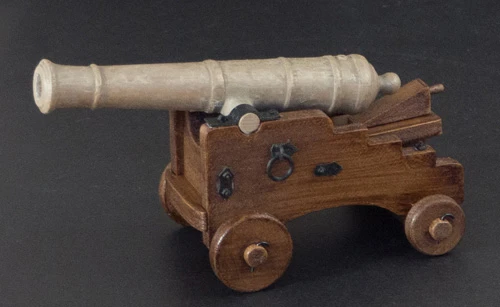
For the model shown, the cannon was printed using Bronze Metalfill filament and the carriage was printed using Woodfill filament at a layer height of 0.2mm and an infill of 20%.
Almost all the model components can be printed without supports. Depending on your 3D printer type (resin or filament) you may need to use supports for the cylindrical cannon barrel.
For best results, sand the pieces. If you are going to paint/varnish the components, now would be a good time to do it.
The Metalfill bronze cannon was sanded and then brushed and the Woodfill carriage components were sanded, stained and finally varnished.
Stage 5 Assembling the 3D Printed Parts
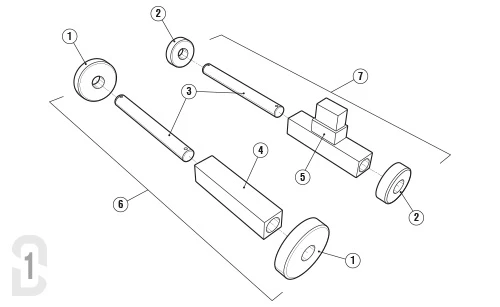
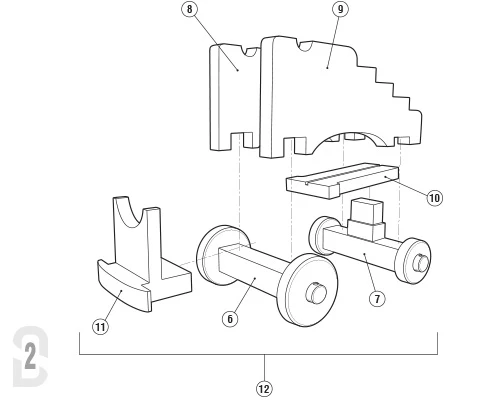
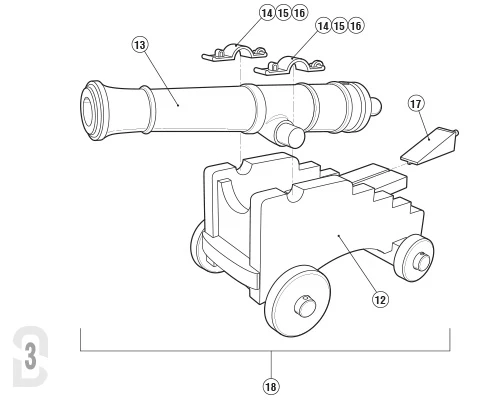
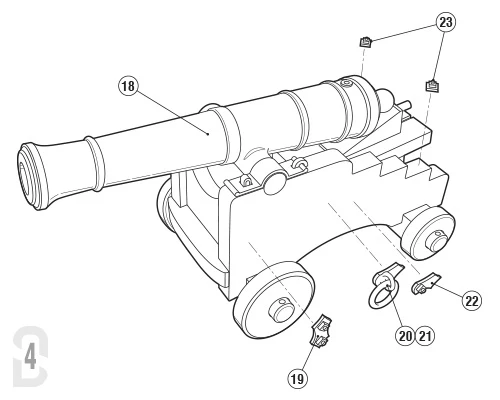
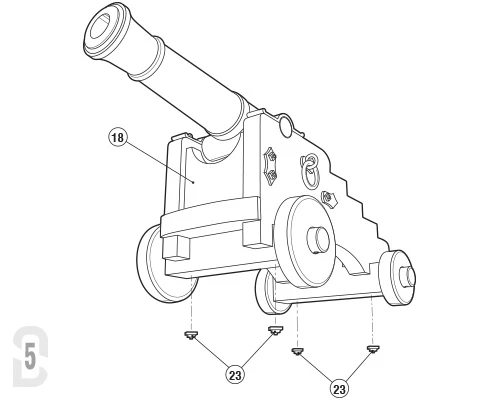
Although the 3D printed cannon model is fairly intuitive to construct, I have prepared some illustrated instructions to guide you through the assembly. Superglue was used to attach the pieces together. (As the linch pins for the wheels would have been very small and fragile to print, I just cut and bent some paperclips and inserted them through the holes in the axel)
Cannon Parts List:
- 1 - Front Wheel x2
- 2 - Rear Wheel x2
- 3 - Axle x2
- 4 - Front Axle Tree
- 5 - Rear Axle Tree
- 6 - Front Truck Assembly
- 7 - Rear Truck Assembly
- 8 - Left Bracket
- 9 - Right Bracket
- 10 - Stool Bed
- 11 - Front Board
- 12 - Carriage Assembly
- 13 - Cannon Barrel
- 14 - Capsquare Joint x2
- 15 - Capsquare x2
- 16 - Capsquare Eyebolt x2
- 17 - Quoin (Wedge)
- 18 - Cannon Assembly
- 19 - 2-bolt Plate x2
- 20 - Breaching Ring x2
- 21 - Breaching Ring Plate x2
- 22 - 1-bolt Plate x2
- 23 - Bolt x6
Stage 6 Sit back and enjoy your work!
Contact us for more information about our 3D printing services and how they can benefit you and your company.
If you enjoyed this tutorial, you can find more like it on twitter @newskindesign and @thelink3ddotcom.

Request Your Free Quote Today
Tell us about your project and which Design Services you require. We will get back to you with more information and a quote.
Get In Touch